You can access the Outlook settings by clicking the gear icon in the top right corner of the Outlook web app and then clicking "View all Outlook settings."
Skip to a section:
- Layout
- Compose & Reply
- Rules
- Sweep
- Archive
- Move to
- Junk Email
- Customize Actions
- Automatic Replies
- Sync Email
- Message Handling
Layout
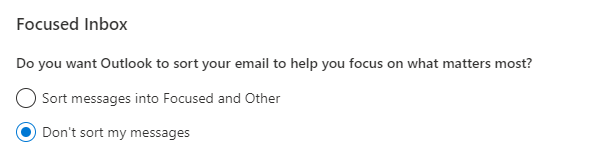
Focused Inbox separates your inbox into two tabs—Focused and Other. Your most important email messages are on the Focused tab while the rest remain easily accessible—but out of the way—on the Other tab.
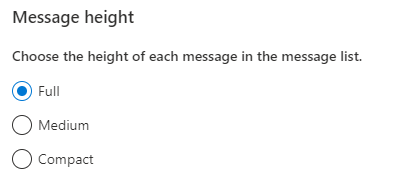
Allows you to compact the size of the message to allow more messages to appear on the screen
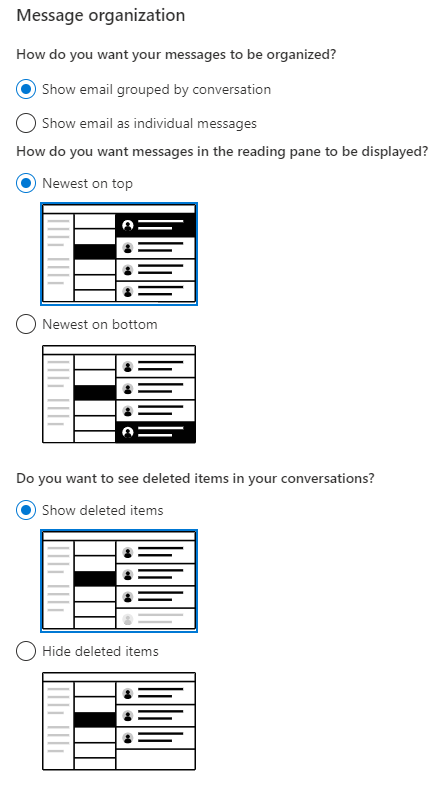

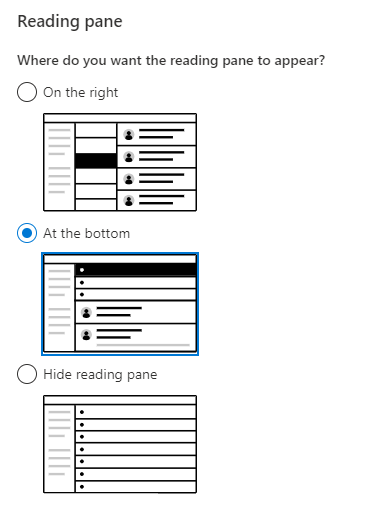
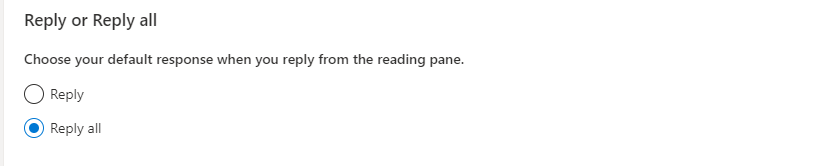
There are three options for the reading pane.
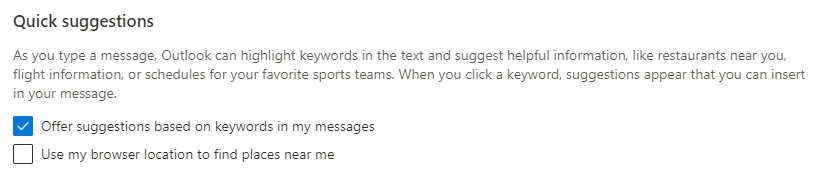
Compose & Reply
Go to Settings > View all Outlook settings > Compose and reply.
Under Email signature, type your signature and use the available formatting options to change its appearance.
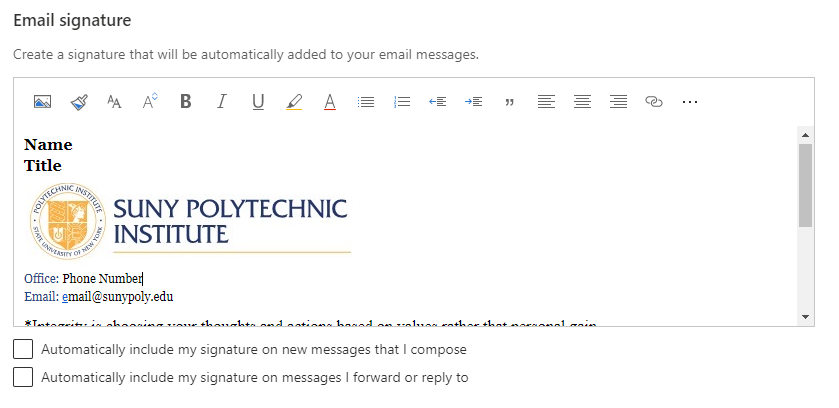
Note: You can have only one signature per account.
If you want your signature to appear at the bottom of all new email messages that you compose, select the Automatically include my signature on new messages I compose check box.
If you want your signature to appear on messages that you forward or reply to, select the Automatically include my signature on messages I forward or reply to check box.
If you don’t select these options, you can manually add your signature to a selected message. For details, see Manually add your signature to a new message below.
Select Save when you're done.
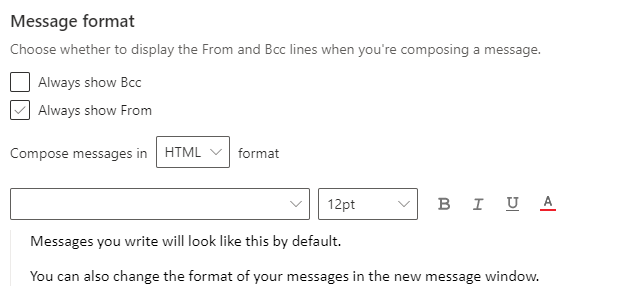
The Outlook Web App allows you to set the Bcc and From options to show in each new message
Allows you to set the font and size of the text of your message


Rules
You can organize your email using inbox rules. For example, you can create rules that will automatically move messages to other folders, or even delete them based on certain criteria.
Rules are applied to incoming messages and can be created from any folder.
- To quickly create a rule that moves all email from a specific sender or a set of senders to a folder, right-click a message in your message list that you want to create a rule for, and select Create rule.
- Choose the folder where you want all messages from that sender or set of senders to be moved, and then select OK.
- Select OK. The rule will be applied to all incoming messages. If you'd like to run the rule on your inbox immediately, select the check box for Run this rule now in Inbox.
Note: Currently, you can only run rules in which a message from a sender is moved to a folder. You can't run other rules, such as those that use a message title or mark a message as unread.
If you'd like to do more than just move the message from a specific sender or set of senders to a folder, select More options. The rules settings menu will open.
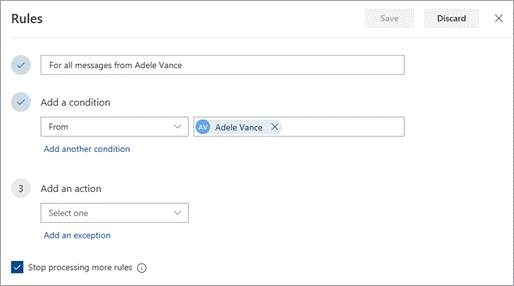
Every rule needs at least three things: a name, a condition, and an action. Rules can also contain exceptions to conditions. You can add multiple conditions, actions, and exceptions at each step by choosing Add a condition, Add an action, and Add an exception.
If you don't want any more rules to run after this one does, select the Stop processing more rules check box. For more information, see Stop processing more rules in Outlook on the web.
Press Save to create your rule or Discard to cancel rule creation.
- At the top of the page, select Settings > View all Outlook settings.
- Select Mail > Rules.
- In the rule you want to edit, select the pencil/edit icon.
- Press Save to save your edited rule.
Note: Some rules created in other versions of Outlook can't be processed by Outlook on the web. You won't be able to run or edit the rule in Outlook on the web.
- At the top of the page, select Settings > View all Outlook settings.
- Select Mail > Rules.
- In the rule you want to delete, select the trash icon
Tip: If you just want to turn the rule off for a while, select the toggle next to the rule.
Inbox rules are applied to incoming messages based on the order they're in within the Inbox rules list. You can arrange the order in which the rules you create are applied to messages coming into your inbox.
- At the top of the page, select Settings > View all Outlook settings.
- Select Mail > Rules.
- Select a rule, and then use the Up arrow or Down arrow to change the order in which the rule is applied to incoming messages.
By default, an inbox rule runs on incoming messages after you've created the rule. To run a rule on existing messages:
- At the top of the page, select Settings > View all Outlook settings.
- Select Mail > Rules.
- Select the play button next to the rule you want to run.
Note: Currently, you can only run rules in which a message from a sender is moved to a folder. You can't run other rules, such as those that use a message title or mark a message as unread.
Sweep
Note: Sweep rules run once per day. Inbox rules run as soon as email arrives in your mailbox.
Use Sweep to quickly delete unwanted email in your Inbox. Sweep gives you options to automatically delete all incoming email from a particular sender, to keep only the latest email, or to delete email older than 10 days.
- Select an email message from the sender whose messages you want to delete.
- On the menu bar, select Sweep.
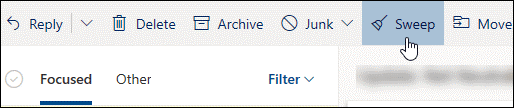
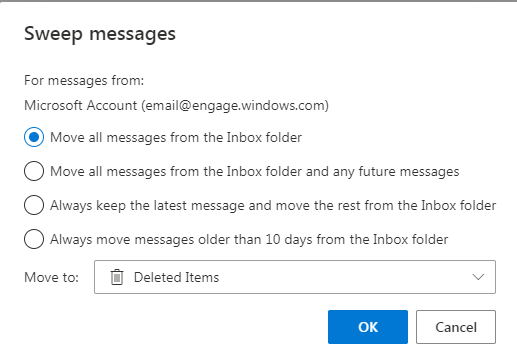
Note: The Sweep option isn't available from the following folders: Junk Email, Drafts, Sent Items, and Deleted Items. - Choose how you want to handle email messages from the sender you chose.
- Select Sweep to perform the selected action.
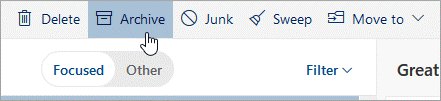
Archive
You can store email messages in your default Archive folder.
- Select an email message you want to archive.
- Select Archive.
To get to your Archive folder:
- Under Folders, select Archive.
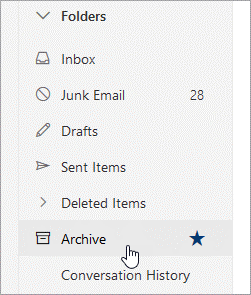
To restore an archived message back to its original folder:
- Select the message in the Archive folder
- Select Move to
- Select the folder or type the name of the folder that you want to move it to
- See the next section for more information.
Move To
Move to lets you move email messages to a specific folder. For example, you can move all email from a specific sender from your Inbox to any folder you choose.
- Choose an email message from a specific sender to move all email received from that sender to another folder.
- Select Move to > Move all email from ....
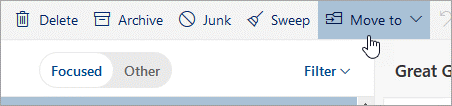
- Select Move to <Select folder> and choose one of the available folders.
- Select OK > Move all.
- Choose an email message in your Inbox.
- Choose More commands on the command bar to mark messages as read or unread, pin a message at the top of the message list, or flag a message for follow up.
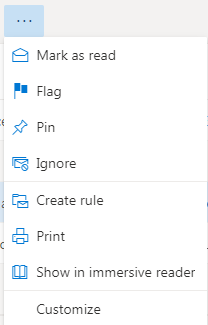
- Choose the action you want to perform on the selected message.
- Select Filter at the top of your inbox.
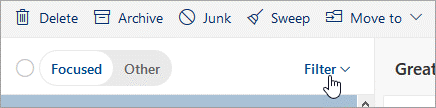
- Under Sort by, choose any option you prefer to sort your email.
Junk Email
To add an email address or domain to either the blocked or safe senders and domains list:
- Click on the Add option


- Type the sender's email address or domain
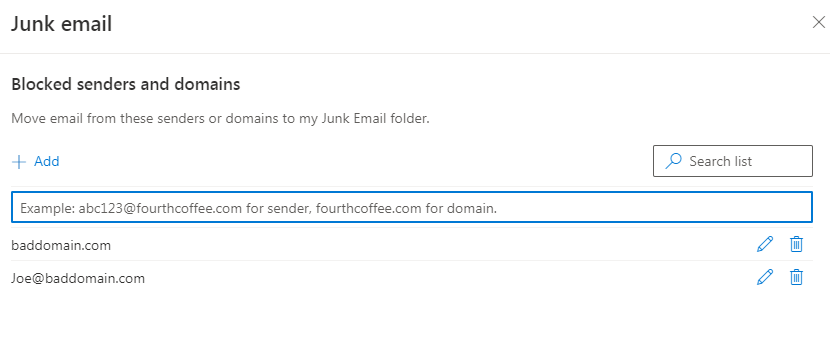
- Press the Enter key to confirm
- You can also edit or delete an address or domain by using the Pencil or Trash Can icons as shown in step 2.
Customize Actions
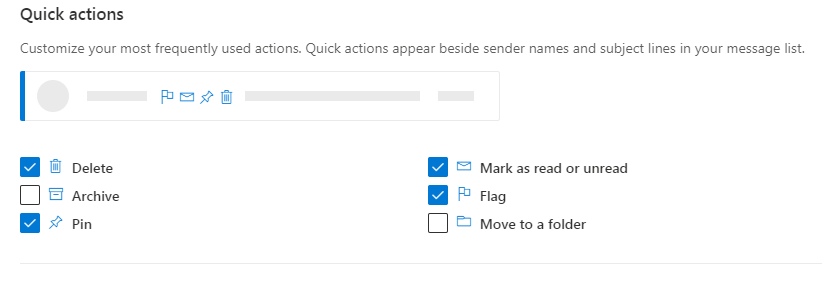
Customize your most frequently used actions. Quick actions appear beside sender names and subject lines in your message list.
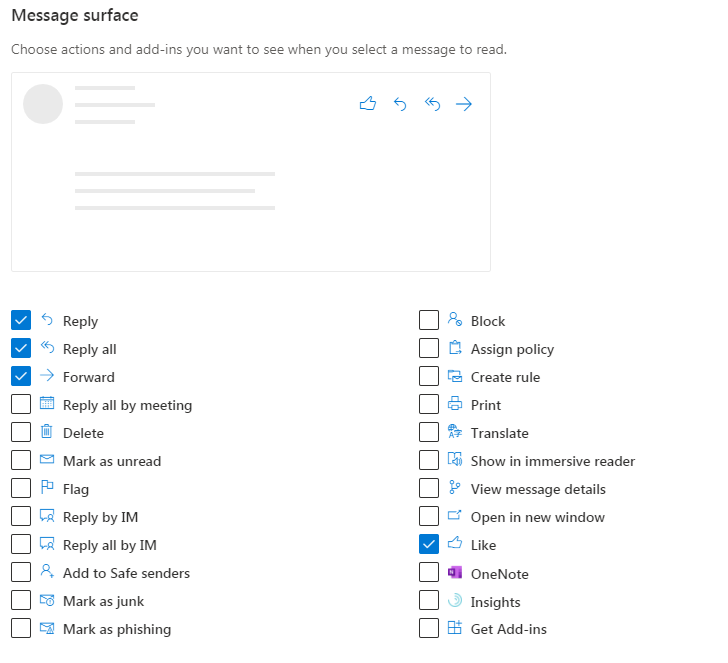
Choose actions and add-ins you want to see when you select a message to read.
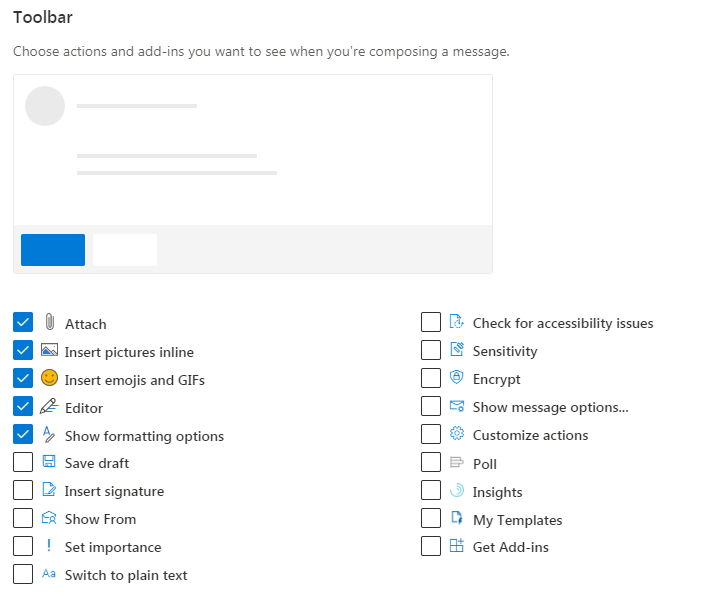
Choose actions and add-ins you want to see when you're composing a message.
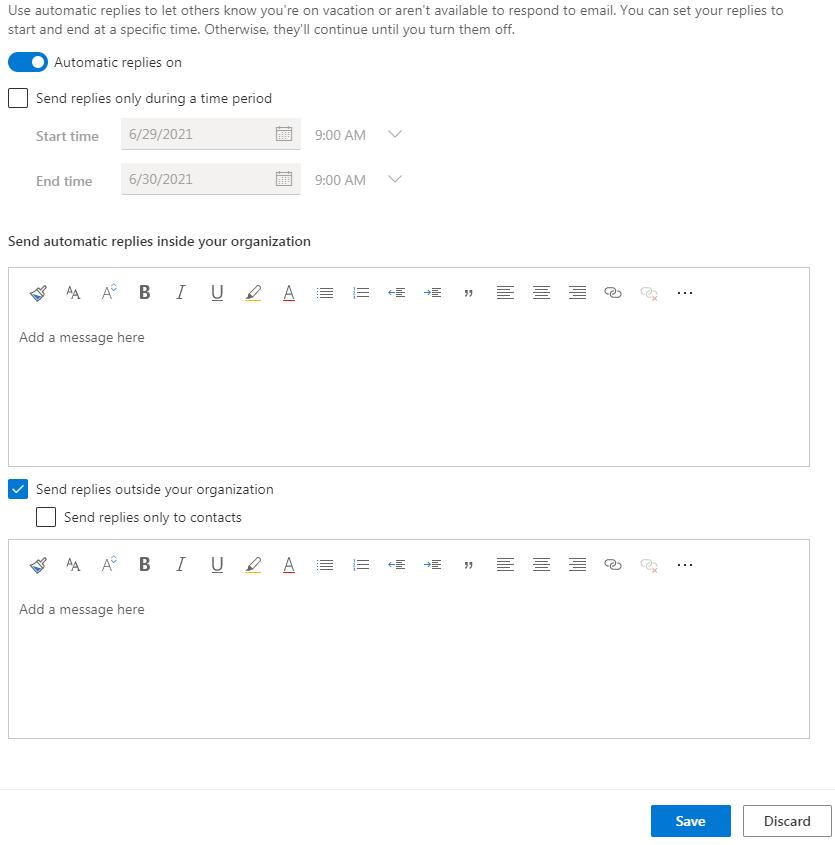
Automatic Replies
Use automatic replies to let others know you're on vacation or aren't available to respond to email. You can set your replies to start and end at a specific time. Otherwise, they';; continue until you turn them off.
Sync Email
This option provides the information needed to set up Pop or IMAP on your account
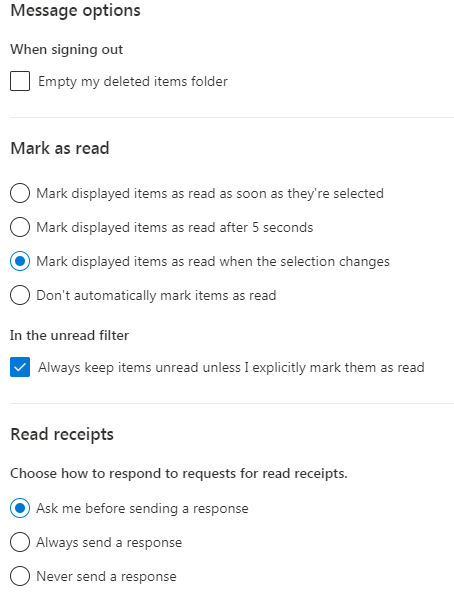
Message Handling
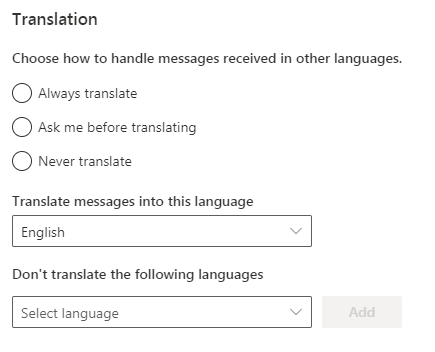
Choose how to handle messages received in other languages.
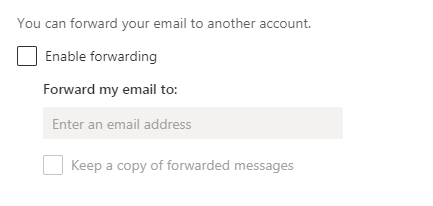
You can forward your email to another account.